“This is smaller than expected. It has a high pixel density so you can pack information onto the screen if your viewing distance isn't too large.
I also have the 5.7"-impression and the 5.7"-InkyFrame. If you figure out the correct cabling, you can also operate the Impression with a Pico(-W). The Impressions are perfect for borderless frames.”
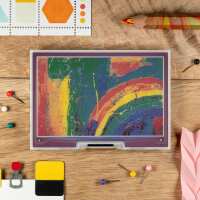
“The colours are vivid and nicely saturated. Although the images don't get as sharp as in an Oled display they do have a charm of their own, like an old postcard or postal stamp.
It is also easy to get started with the SDK and examples with "curl https://get.pimoroni.com/inky | bash"
It is also very convenient that once the image is redrawn the screen stops consuming energy, to save on batteries.
The only not so good issue is that the screen refresh takes about 15 seconds. But that's something Pimoroni already says, so everyone should be expecting it.”
“Hi! Lovely idea, great size, but I did not realise I have to solder the GPIO header on my Raspberry Pi to get it to work (I don't know how to solder yet so I have not tried it). I did not realise the flashing the pigments have to do when they activate between updates (I saw it in a youtube video) and I think it limits what kind of projects you can do. I don't want to be a party pooper but I would have wanted to know these things, maybe it will help someone else.”
Ahoy! Thanks for the review - I've updated the description slightly to hopefully make it clearer that your Pi needs to have a 40 pin header attached to be able to use a HAT. We'll also look at adding some videos showing what a Inky refresh cycle looks like - thanks for the suggestion!
We've got a beginner's guide to soldering headers to a Zero here if that's useful :) https://learn.pimoroni.com/article/the-ultimate-guide-to-soldering