“Brilliant!! was tricky to put together with my Shrek size hands getting the lead from the fan into the board but got there in the end using tweezers, screws have a nice tight fit and good threads even being plastic. Fan was so easy to install just literally place it onto the end pins and powered up the pi and it worked perfect. I am sitting about 50cm from the pi and have only heard the fan once when watching videos for about 1hr on youtube, apart from that it is so quiet. looking forward to coding it and setting it to automatically come on etc. Great product A+++”
“Bought the shim after originally going with the heat sink. The heat sink worked well but it’s got nothing on the fan shim!
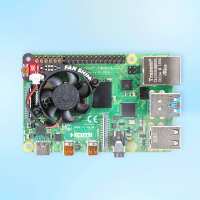
This tiny little fan doesn’t look like it can do much, but it really can. It cools the pi significantly better than the heat sink, and using the recommended installer it doesn’t have to come on very often to do so at all.
Even when it does come on it’s barely audible when sitting next to it.
I can highly recommend the shim for all pi owners.
If I had to say there was any downside it would be with the pibow case. The shim doesn’t fit it very well and the button becomes very easy to break. Shame that there wasn’t some coordination with the two teams to account for this and cut a small notch in the pibow to account for it.”
Ahoy! Recent Pibows should have a notch in the top two layers to accommodate the Fan SHIM button - drop us a line at support@pimoroni.com if you need us to send you out some of the revised layers.
“Not too complicated to assemble, though some side images could be useful for noobs how the screws should be ordered, though I could figure it out by looking at the fan starting to bend and it made me think.”
“A very neat and quiet fan with software control. I'm finding it to be a useful unit that really does cool the processor of my RPi4 in its Pibow 4 case. I've not conducted any experiments to establish the full cooling capability but it certainly can drop the processor temperature by around 10C when playing music files. It is just a little tricky to assemble the hardware and software, see comments below, and that is why I am only giving this device a 4 star rating.
The issue with assembling this fan unit is that you have to rotate the fixing nuts in some very constricted spaces. You cannot rotate the bolt, which looks to be in the clear, because it is already fixed by a nut that is used as a spacer. After plugging in the fan to a connector on the board (also a slightly tricky job in a small space that needs tweezers to complete) the completed assembly is dropped over the GPIO pins of the Pi while it has no power on it. There's no soldering required, it's just small scale mechanical assembly that needs some basic skills.
The control software needs to be downloaded from GitHub. It's not quite as simple as the instructions on the product web page say. I found that I needed to register for a free account with GitHub before I could access the project properly. That said the software appears to run exactly as expected, turning the fan on and off at the specified temperatures as reported by the Pi's processor temperature applet. I've still to experiment with writing software to control the rainbow LED and push button features but see no reason why these should not work.”
“The FAN SHIM is a good product. No noise and you can install the software that start and stop the FAN, depence the temperature. But look out which Pibow case for the Raspi 4 you get. Some cases missing the little cutout for the button of the FAN. When inserting the FAN, the button can break. It happens to me. In the Pibow you can't use this little button, it's blocked..The best would be, the botton would be upside down, than you could use it.”
Ahoy! Recent Pibows should have a notch in the top two layers to accommodate the Fan SHIM button - drop us a line at support@pimoroni.com if you need us to send you out some of the revised layers.